Friday, October 23, 2015

Modern Mexican Embriodered Dress

 Daily Deals by 1-Day


If you've been following me on Instagram, you'll know that this dress has been months in the works! 

It started with me discovering the bright flowers in Mexican embroidery and falling head over heels in love. If I could cover myself in pretty colourful flowers every day, I would. 

Although I love the beautiful embroidery, I'm not such a fan of the traditional peasant dress that the stitching is usually done on. I feel much more comfortable in clothing that fits my curves and accentuates all the good bits. 


And so formed this idea of doing my own embroidery on a dress. First I had to learn to embroider! I practiced satin stitch on a scrap of fabric I later turned into a pouch

And as it turned out, I was fairly good at it. 

I then practiced making this dress pattern for myself (I had previously used this pattern to make 3 bridesmaids dresses earlier this year, but hadn't fitted one to my own body.)

It turned out the pattern needed a LOT of adjusting for my body. 
These adjustments included::
  • Taking in the back neck line so it didn't gape (I used this gaping fix tutorial and it worked a treat) This is a problem I have never had before, and may be related to this pattern.
  • Lifting the waist line up by 3cm (it made all the difference)
  • Sway back adjustment to avoid puckering in the small of my back.
Now that I have perfected this pattern I think I'll need to make another version at some point. If I had known that the pattern would require such restructuring I would have ditched it and chosen a new one, but once you get started on something it's hard to stop! 


Once I was happy with the pattern, I started to embroider onto my fabric that was marked out in pencil. This took weeks sitting in front of the TV each night stitching away, trying to match up my flowers and neatness on both sides. 


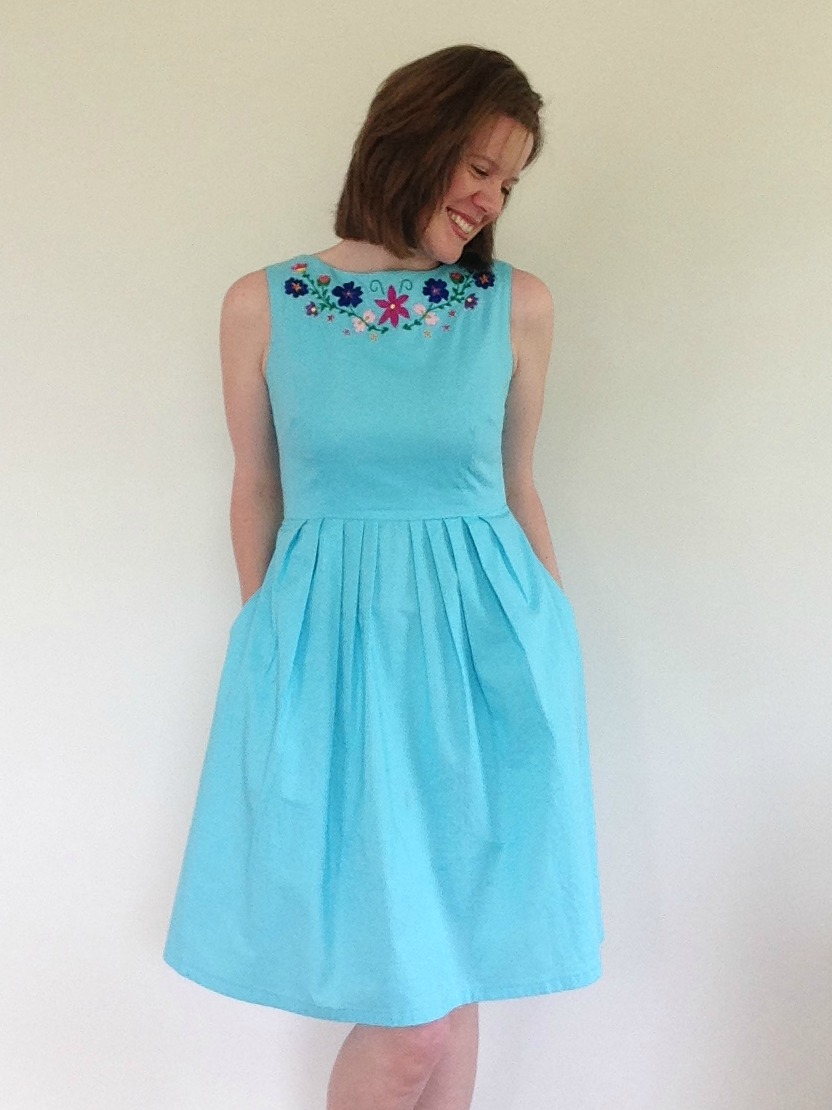
As I was stitching onto a large piece of fabric it was hard to tell how the embroidery would look when it was finished, in hindsight I wish I had brought it downwards a little, and also turned it into more of a V shape with the bottom of the V lining up with my sternum. However, I couldn't have known that at the time.

The dress bodice is fully lined and hand stitched closed, and includes an invisible zipper down the back.


I am super crazy happy and proud of this dress. It fits me like a glove, I love the happy colour, and I am very proud of my stitching.


And also, pockets! Who doesn't love pockets?
Thank you so much for encouraging me in my stitching and dress making, my friends will be very happy this project is finished as they've been hearing updates about it for months! And now they will get to see me in it all summer long!

DETAILS:
Blue fabric: 100% cotton
Embroidery: Hand stitched and designed by me using DMC thread
Dress Pattern: New Look 6223


Wednesday, October 7, 2015

Sewing With Kids - A How To

Cheap Flights by House Of Travel


Yesterday while I was sewing a dress for myself, Milla, in 4 year old fashion, asked what age she would be allowed to sew. 

She took me by surprise, and I suggested that she could learn any time. 

And so, capturing the moment, today we sewed up some fabric that I had purchased for her, with the idea of making her and Katie a matching skirt and dress.

My 4 year old is a concentrator and a rule follower, so I knew that she would ace this. My aim wasn't for her to sew the whole skirt herself, but to introduce her to the machine, how it works, and for her to feel respect, and also a healthy fear, towards the needles, pins, scissors etc.

Here are some easy tips on sewing with Little People for the first time::


Sewing with Little People:
  • Keep it simple! A project that can be completed in an hour will bring instant satisfaction, and something they can wear or play with is an added bonus. 
    • Think easy: Skirts, shorts, tote bags, peasant dress, pillow cases, head bands, PJ pants. Are you feeling inspired yet?
  • Have everything you need prepared before you begin, I had my measuring and pattern piece already cut out and ready to go, along with my sewing machine all set up before I even mentioned sewing.
  • If your person is really little, like mine (only 4 years old!) set them up at a smaller table so they can have the joy of pressing the presser foot with their feet!
  • Explain different parts of the machine to them, let them have a go at lifting up the presser foot, doing the back stitch button and the foot pedal. Try them out on a large piece of spare fabric first. 
  • Breathe and encourage. You may suddenly realise just what you have gotten into! 
  • If your Little Person is older and you are leaving all the sewing to them, use little pegs on the edge of the fabric in lieu of pins.
  • Change it up at each step. For one part I asked my daughter to be the presser foot controller, another time she was in charge of back stitching, then she had a go at the foot pedal, another time she helped me feed the fabric through, and then she was in charge of taking out all the pins. 
  • You'll know based on your own child how to keep them interested, safe and learning. 


We made a circle skirt for our Intro to Sewing 101. Milla had a go at all parts of it, and she tells me her favourite was pushing it down with her foot. 


I clued myself up on the Dana Made It Circle Skirt Tutorial so that when it came time to sew, I knew exactly what I was doing. 

The maths (pi and radius, yikes!) checks out, and fits perfectly! 

Instead of using the wide exposed elastic band like in the tutorial, I made a little casing with some extra fabric and the same waist measurements, and used 3/4" elastic inside it. 

To finish it off we used pre-made bias binding along the edge, which I let Milla choose the colour of. She was thrilled to have some choice and control in a process which is completely new to her. 

As binding is quite tricky for little fingers, I pinned it all in place and sewed very slowly around. I noticed half way through that Milla also had her foot on the foot pedal, ever so gently, just feeling for how I was pushing it down. During the binding step, Millas job was to pull each pin out before I sewed over it. 


She was so careful, and was a real delight to work with! 

We will definitely be sewing together again soon. 


Her twirly skirt is SO whirly! She loves it! 

Thanks for stopping by and reading my blog, your encouragement spurs me on! x

READ MORE SEWING:


Pin It button on image hover