Showing posts with label Blog Tips. Show all posts

Monday, April 8, 2013

How to Link Your Comments to Your Email Address


How to be a No-Reply Commenter No More!

Each to their own, but it drives me bonkers when I get a really great, well thought-out blog comment from someone I have never heard from before and I have JUST the reply to send them! Unfortunately when I hit "reply" in my email it comes up with that tearful "no-reply comment" in the To: section of the email.

Breaks my heart. Every time.

If you've never got an email reply to a comment you've left on someones blog its possibly because you're a no-reply commenter. If you dont want to be (as in, you want to be able to receive email replies) then this tutorial is for you!

I love continuing blog comments through emails back and forward. Some of my readers are really brilliant and I love hearing from them and do my very best to reply to them. Please make that easy for me! Become a reply commenter!

Psst - if you're a blogger did you know you can reply to comments sent to your email address for publishing approval? Just hit reply and the persons email address will (should) magically appear! Its a great way to build relationships with your readers!

If you're on blogger here's how you do it: (this wont work for google+ profiles, check out Louana for a tutorial on google+ commenting)


On your blogger.com dashboard, up the top right had corner you will see your "profile". Click on it and it will take you to your public blog profile. 

This is where people come when they want to see a photo of you, see where you live or what you have to say about yourself. 

I very rarely venture to people profiles these days, most bloggers have clued up and given themselves an About Me page that gives a lot more information!


In the top right hand corner of your Blogger profile you'll find "Edit Profile". Click it!


Editing your profile will bring up some of the details you've chosen to share with Blogger and Google.

Make sure "Show my email address" is checked!

Below that under "Identity" and "Email address" this is the address your blog comments will be emailed to.

My main email address is sophie[at]moo2.co.nz - however I get my blog comments sent to sophieslim[at]moo2.co.nz because when I reply to them it will automatically come from "Sophie Slim" and contain my blog signature! If you want to do the same, put your alias email address here.


Hit SAVE down the bottom and go back to your profile page - under "Contact Me" should now contain a link to your email address!

(yes, it does mean your email address is made public if people click it)


HOORAH! I hope you'll consider allowing your email address to be linked to your blog comments in the future!


Please let me know in the comments if you use this tutorial and became a reply-ee! I love to hear your feedback on my blog tutorials, if you would like to learn anything else let me know!


FOR MORE:

If you're on Google+  you'll want to look at Louanas tutorial on how to link your comments to your email! 

Tuesday, February 12, 2013

How to Get Your Blog Ranking High On Google


So you've done a Google search and discovered your blog post, business or name is way down on the list, or perhaps not even there? Ever wondered how you get your name, business, product, image etc to the top of that list?

It's using a handy little bit of knowledge called Search - Engine - Optimisation, or SEO for short, and I'm going to let you in on a few of its secrets today, because I care about you and your blog.

And here's the truth, its all to do with your hyperlinks.

Every time you click a link on the internet, you're sending a really quick message to the staff at google to tell them what a website is about so they can include it in their search engine.

Examples:
  • BAD: I love to tell you about blogging, go check out my blog design tips here
The above link, when clicked, will tell google that the web address it is linked to is about "here". Not really helpful at all. 

When clicked, the above link will take you to my page about designing blog headers, and will TELL Google that the website is actually about designing blog headers. Amazing!

So when someone types into google "how to design a blog header" you will notice that my page is the very first that comes up. That is no accident. 

The more that link is clicked with the correct description, the more google knows thats what the link is about, the higher it will appear on google searches. 

Get into the habit of slightly rewording your posts so you can use hyperlinks correctly, and dont forget to give your blog posts relevant titles! 

Also, pay others the courtesy of linking them correctly when talking about other sites on your own blog. When your readers click those links you'll be doing them a favour! 


Images:

The same theory applies to google image searches::

NAME YOUR PHOTOS! 

Simple as that. Each time a photo is clicked google gets told what the photo is about because of its file name. 

This is time consuming and not something I often do on my blog, however there are a few blog posts where I have pureposefully named my photos, one of those is my blog on going to the Taylor Swift concert with a 6 month old baby

I receive blog hits every single day because of people searching about taking a baby to a concert (i'm the top result), and for people doing image searches for "taylor swift crowd photo" (i'm the 6th result). 

--------------------------------------

Read More:
If you want to know more about blogging, check out some of my most searched topics:
Must Know Side Bar Tips
How To Find Out The Size of Your Blog Header
How To Link Your Email Address To Your Comments (so bloggers can easily reply directly to you!)
How To Create New Tabs On Your Blog
How To Create A Blog Header In Under 5 Minutes

--------------------------------------

Did you know about SEO before you read this post? Anything else you would like to learn? Leave a comment and let me know!


Tuesday, July 3, 2012

How To Create Tabs in Blogger


Pages are really beneficial for blogs, in them you can have 'about me' details, contact details and any extra things you want to convey but they don't really have a 'home' on your side bar (or would make it really cluttered!). It's really easy to do!

Heres How You Create Pages / Tabs:


On your Blogger dashboard find your 'pages' option


In your Pages choose "New Page" from here you have two options: 


Blank Page:

This is where you have a blank field, exactly like a new blog post, that you can customise with links, photos and text. This is great for your "About Me" page.


Web Address Page:
This will open a new window where you can enter the name of your page and send the reader to a new web address. For example, if you had an online shop you could call you page 'Shop' and have it link to your felt store.

The down side with this (having a web address page) is that obviously your readers are going to a different web address that isn't your blog. We call these "Exit Links" and you want to minimalise them so your readers stay in your blog land as long as possible.


Once you create your new page and save it it will be added to the bottom of your list.

Re-Order Your Pages:
You can re-oder your tabs by clicking on the blue filled in side of the box and dragging it into the right order. You'll see when you do this they all jump around to adjust.

Extras For Experts:
Every now and again you might find the need for a web address but you might not want to publish it on your blog. It might be to share information with a group of people, photos, codes, anything really.

Create a page for this information like above, save it, then drag and drop the box into the "hidden posts"  section. (You'll see published, drafts and hidden options available). That way, when you view it the web address still exists but it doesn't show up in your tabs (but it will show up in google searches - beaware that it isn't private!)


Hit "save arrangement" in the top right hand corner and you have a new set of tabs! HOORAH!

Brilliant huh?


Read More:
Do you have tabs on your page? Are you going to make some now? Leave a comment and let me know!


Tuesday, June 19, 2012

How To Create Side Bar Blog Buttons (VIDEO)


If you have an about me page, any regular features on your blog, something your readers ought to know about you, or a blog in general, then you definitely need customised side bar buttons.

It is really easy to create your own side bar buttons and this video will show you how. If you viewed my video to make your own blog header you will realise that it uses almost the same process of creating and uploading your pictures to do so.

The standard size of a blog button is 160 X 160pixels - this is a great size especially if you are creating your button that is intended to be share with others because you know it will fit in their side bar (like my sisterhood button)

Otherwise, you can create your own custom sized buttons (like my "about me" and Create ones on the right of my blog). To find out the size of your blog side bar use the same method I show you to figure out your header size but for your sidebar instead!


After watching this video: Honestly, the bum bum thing about using this method to upload your button to blogger is that if it doesn't fill your whole side bar up (eg, if you used the default 160x160pixels size) it will stick to the left side of your side bar.

I like things to be in the middle. 

To fix that you're actually going to need to do it with HTML and I thought that was getting a little bit complicated for this video. Instead, I will do an 'extras for experts' video in the near future and explain how you do that, also how you share your button with the big wide world using code! Hoorah! Easy peasy! (video still to come...)


READ MORE:
How to create pages and tabs
How to link your comments to your email address so bloggers can reply
How to get your blog turn up in Google searches

Have any questions for me? Leave them in the comments or email me directly on sophie AT moo2.co.nz

Tuesday, June 5, 2012

How To Create Easy Blog Headers


Last week I taught you how to find the dimensions for your blog header, and before that gave you some useful side bar tips for your blog.

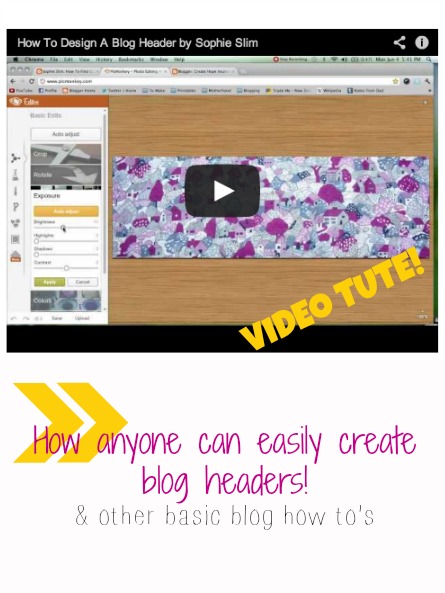
This week I am showing you (in a video!!) how to turn those dimensions into a real life header.

All you need is a web browser, those dimensions and a photo while you're watching this video I made:


Here I use picmonkey to create a custom header for Miriam at Create, Hope, Inspire.


READ MORE:
How to find the size of your blog header
Introduction and side bar tips
How to create side bar buttons
How to create pages and tabs
How to get your blog found by Google
How to link your email address to your blog comments


Have any questions for me? Leave them in the comments or email me direct on sophie AT moo2.co.nz 

Tuesday, May 29, 2012

How To Find Out The Size Of Your Blog Header


The header on your personal website is one of the first things your viewers will see, so it needs to represent you well and give the viewer an instant download as to what they can expect, along with being visually appealing.

All around the blog world I see headers that are off to the left, or are super duper huge like they have just uploaded a whole photo. Its good to see a little bit of blog text below your header - this is your "landing space" where peoples eyes are drawn to. If you just have a huge photo as your header a reader might only spend 1 second on your page and they wont learn anything about you!

This is so frustrating for me because I know it is such a simple fix.

If you're thinking "that's exactly whats happening on my blog right now" then this is for you, so keep reading, I might just be able to help you!

Your header is off center and massive because it's the wrong size for the space where your header should be. 

You need to make a header that is a specific size for your website (this will depend on your blog template or what you've chosen your blog dimensions to be (which probably happened when you first made your blog. They can easily be changed!)

Here's how you find out the size your header needs to be

  • To find out the size of the space open up google chrome (its free to download, and in my opinion the best browser you can use right now) (You can also open Firefox and it will do almost the same thing)
  • Right click on your blogs tab line - This will open up a little drop down menu, click "inspect element"("Get info" in Firefox)

  • This Inspect Element button will open up a new area in the lower half of your chrome browser. Here, it will bring up all of the HTML that you are viewing on your page, and highlighted, it will show you the area that you just clicked on. It might look a little scary.
  • If you happen to move your mouse and loose the info, on the top half of your browser hover your mouse over the area you want to view (your tabs (because this is the width of your page))
  • Alternatively, you can use the up and down button on your keypad to scroll through the lines of code. With each line you scroll down, on the top half of your page a new section will be highlighted. Keep scrolling until your tabs are highlighted, like below.

  • Can you see 1040x30 px? These are the pixels. The WIDTH (from left to right) of my header needs to be 1040 pixels.
  • If you're planning on redesigning your header the height of it is up to you. My current header is 300 pixels. 400 pixels is nice too. You choose! Just enter the number in whatever you're using to create a header and play around with what works best with your design. I've done a handy blog post and video on how to design a blog header in 5 minutes using a free online editing program. 
  • So, my headers dimensions are 1040x300pixels

Write your dimensions down and stick them to the fridge, you'll need to remember your pixels when you go and create your new blog header!

If you would like to play along but you are already confused, please email me, sophieslim@moo2.co.nz , I'd love to help :)

Read more on blog tips:
Must Know Side Bar Tips
How To Link Your Email Address To Your Comments (so bloggers can easily reply directly to you!)
How To Create New Tabs On Your Blog
How To Create A Blog Header In Under 5 Minutes
How To Get Your Blog In Google Search Results


Was this helpful? Have you used any of my tutorials? Leave a comment and let me know how it went!


Tuesday, May 22, 2012

Must Know Tips About Your Blogs Sidebar


I blog for fun, to learn, be a part of a community, to document our lives, to resource others and to inspire a little bit along the way. That all said, I am really interested in making my blog a better, nicer place. I like aesthetics and I can appreciate that as people, we are very visual and only have a few seconds to make a first impression.

In person, that impression can be made in many different ways; In the warmth of your smile, the tone of your voice, your appearance and hygiene, your body language. When it comes to your website you only have a few seconds and those seconds are usually taken up with the visual appearance of your blog.

Now, I'm not graphic design whizz, and my own website isn't perfect. Everything I know has been self or husband taught, but I have spent many years creating blog headers, keeping a website and designing church advertisements. I've picked up a few things along the way and I wanted to share them with you.

I've made a whole basic blog design series that I am constantly updating and adding to. There are links at the end of this post, or subscribe to my blog to get the latest.

Tips For Your Side Bar

  • Do include a clear about me and a "landing space" for new readers.

    What's a landing space? Its a place your new readers can rest their eyes and know about you in a glance. Its a place they will go to "next" to find out more about you. Give them that space to land. Include a few sentences to sum up you and your blog and direct them to where they should go next - Popular posts? Things they must know about you? Meet the family?

    What is the most important thing for your new readers to find when they come to your page? This should be included near the top of your side bar.
  • You want your new reader to see the best of you, so keep it fresh and new and relevant!

    Chuck out those old blog awards from 2007, you want readers to know the now you, not the old you. Do you have a new post to add to your popular posts repertoire?

    Every few months I add something new or update my side bar, this keeps it slightly different and gives a very loyal reader something new to notice and look at. It also means if my information is changing and easily accessible people will spend more time on my page.
  • Don't go overboard and change your whole design every week. You want your whole image to represent you and be recognisable to a returning reader so they remember you.
  • Have your most important things at the top - for me thats a little bit of information about myself and my sponsors. For you that might include your post history, or your shop details. Order your buttons in priority.
  • Keep all of your icons in your side bar aligned. You definitely don't want some things to the left, others to the right and a couple in the center. Have them all in the same space (center is good).

    To align them in the center, go into the HTML widget in your blogger template and add < c e n t e r > (without spaces) at the beginning of the code and < / c e n t e r > (without spaces) right at the end. Save and repeat for all of your HTML widgets. 


READ MORE:
How To Get Your Blog in Google Searches
How To Find Out The Size of Your Blog Header
How To Link Your Email Address To Your Comments (so bloggers can easily reply directly to you!)
How To Create New Tabs On Your Blog
How To Create A Blog Header In Under 5 Minutes

Do you have a side bar philosophy? Personally I think they are one of the most important elements to determine the future success of a blog! (Eek! Pressure huh!)


Pin It button on image hover