

Showing posts with label Creative Spaces. Show all posts
Showing posts with label Creative Spaces. Show all posts
Thursday, October 31, 2013


Monday, August 12, 2013
Milla Makes - Pea Coat


I couldn't wait to show my budding model in her new corduroy emerald green coat I made her last night! I'm not usually so nifty behind the sewing machine so I'm thrilled this turned out so well! (like seriously, I'm stumped!??)

I used Big Little's Pea Coat pattern, you can buy a digital copy from Lisa's Felt Shop. It was pretty easy to follow, definitely suitable for beginners (like me)!
The strawberry lining on the inside is so much fun, along with the big yellow buttons! I'm in love! I wish it was in my size! (In fact, I just remembered now I actually had a green coat like this as a teen!)
The sweet head band is from her Aunty in London.
And the poses? Well, I think she's a natural model. Heh. Just like her postie-kid-model Mama, perhaps I could dig up some photos to prove it?
Enjoy the cuteness!


READ MORE:
More Milla Makes
Sewing on Sophie Slim
Other things I've made
What have you been making lately? Leave a comment and let me know!
Wednesday, July 31, 2013
Colourful Fingerless Gloves

I had these planned well before Katie was born and just managed to finish them this weekend.
Originally I had plans for a whole line of colourful fingerless gloves and mittens to sell for the winter, but I've kind of missed the winter boat now haven't I?

They were lots of fun to make, I learnt more about ribbing and increasing and decreasing and I'd still like to make a few more pairs and free-style them a little more to include some different techniques and stitches.

Lovely cosy and colourful wool, love!
READ MORE:
More creations on Sophie Slim
Crochet on Sophie Slim
Tuesday, July 23, 2013
Mr. and Mrs. Moo Pillowcases

In January MrMoo and I celebrated our 4th wedding anniversary. We follow the traditional gift themes, the 4th year being linen / flowers and fruits. I gave MrMoo a new shirt and he printed a picture of His and Hers pillowcases, vowing to give them to me when he was more organised.
Months passed...
*cough*

So here are our Mr and Mrs Moo pillowcases! Happy anniversary to us!
Is it a little self centered that we have our nicknames on our pillows? Please don't judge us! Ha!
I actually really loved making these. The font, the black and white, the clean lines. Tracing the words, ironing them on, stitching around them - every part of the process was so pleasing to me!
If you want some pillows like this and can't do them yourself just email me! :)

Creative Posts on Sophie Slim
Sewing on Sophie Slim
Sophie Slim on Pinterest
Thursday, June 20, 2013
Homemade Chair Pads

(The purple one is extra squishy here, it was still fresh when this photo was taken)
Home made chair pads! Hoorah!
I've had these babies on my to do list for the last 3 years, ever since we inherited these free chairs from a flat-mates Church, I have internally moaned about how hard they are. For three years my butts been sore but you can't complain about free things! Instead I vowed that some day I would afford chair pads. But there's something that grinds my gears about paying $20 per cushion.
Instead, 3 years later I finally bought all of the supplies needed for these for a total of $20 and in my baby-prep-fever had them finished after a week of midday naps courtesy of the toddler.
MrMoo likes modern, simple looking things. However, colour makes me very happy. So I went with my happiness over his and chose a different colour for each chair. Heeee :)
I particularly love the long danglies under the chairs, I did them long on purpose :)


Pure happiness (and comfy bums) achieved!
Joining in with the Matariki Crafting Linky!

Thursday, May 30, 2013
Mamas Knitting

This week I'm showing off my own Mama's handy work. She's a knitter from way back, from that generation that just does it. They clothed their own kids with their skills, they didn't blog or instagram about it for recognition, they didn't look to Pinterest. Because of that she's not often told how amazing her handiwork is so I wanted to publicly praise her!
I am always blown away by my Mums knitting skills. She uses only the loveliest of wools and everything is of such exceptional quality. I am SO lucky to have her as my mum (I was a warm kid!) and the Nana of my own children.


These are some of her latest creations for Baby Moo2, our latest creation due anytime in the next month. Most of these patterns we were dressed in as kids, my Mum remembers the patterns, they are classics and she can do them with her eyes closed.
I particularly love the little newborn cardi in the top right of the photo below. Its so teeny and sweet, it looks like it was made for a little doll.


And the booties. Oh the booties. Milla was dressed in the same ones so I requested them again.
Thank you Mama!! You are an inspiration!
READ MORE:
Thursday, May 23, 2013
Crochet Bear Hat

Lets just all stop for a moment and appreciate how freakin' cute my daughter is. Yup. I make pretty adorable babes.
Anyway, Milla HATES hats so I was reluctant to buy her any for this winter. Instead I wanted to make her one, then I would feel proud but wouldn't feel bad if she wouldn't keep it on. That was my theory anyway. Now that I think about it, if my plan didn't work I would have been heart broken. BUT. My plan worked.
I'm starting to have to be a bit more intentional with Milla, explaining to her what we're going to do when we get somewhere (say hi, share etc), the same goes with clothes and hats. "Its cold outside so when we go in the pram we need to wear our hats!"
She's coming 'round to the idea and wore this hat the whole walk to Toddlerock (breakthrough!)
She thought the ears on this hat were pretty cool. When she put it on to show her Dad she cupped her hands under her chin and pulled the cutest grin. Can't imagine what I mean? Just think cute.
Details:
- Free crochet pattern for flap hat with bear ears
- Easy peasy pattern to follow!
- Made on chunky merino wool from my stash (thanks Rachel!) super hard to use because I couldn't see the holes, lots of stitches will be wrong but you can't tell because its so fluffy (yay!)
- Linking in with Show n Tell at Leonies
- Baaaaaa!

Thursday, May 16, 2013
Lined Drawstring Bag Gift

Lined drawstring bag made by me from The Stash + $3 wooden puzzle from The Warehouse = 1 inexpensive gift from Baby to Milla when she is born.
This baby is already on a budget, and she's lovin' it.

Debs lined drawstring bag tutorial was a huge hit! It leaves the bag so neat and tidy with no seams. I'll be making more for our other puzzles and have ideas of what other items NEED their own bags too! The only problem is I'm running a little short on time to actually complete all these dreams of mine!
[stop by tomorrow, super awesome jewellery giveaway happening here!!]
READ MORE:
Linking in with Show n Tell at Leonies
Thursday, April 18, 2013
Happy Chevron Pillows

Happy Chevron, welcome to my lounge room.
My womb-baby reached 30 weeks gestation this week. That was kind of my mental marker to allow myself to begin preparing as it was also the marker where I would be finished with my Around The Table prep.
On Tuesday I crossed off everything on my to-do lists, remade some new ones and immediately felt the need to complete something on them.
I went out and bought this delicious fabric then and there - something ridiculously bright and happy for our lounge room, and practical for comfort and snuggling / feeding a little baby.


I still don't have a zipper foot for my machine (anyone know where I can find a Globe one??) so I decided to be brave and hand sew my zippers in. WELL. Let me tell you, I have never been more proud of my sewing skills! My zippers look A.maze.Zing!
I totally recommend sewing in your zipper by hand. The first one took me forever, but the second was relatively fast and totally worth it.
Green and orange zippers. Happy colours, happy Sophie.
How have we not had cushions until now??
MORE MAKINGS:
PAINT: Tea Trolley Makeover
PAINT: Tea Trolley Makeover
FABRIC: Peplum Dress
CROCHET: Granny Circle Blanket
Linking in with Show n Tell
Thursday, April 4, 2013
Tea Trolley Makeover


Big thank you's to Deb for offering me this free tea trolley when I was around at her house in February! I had been looking on Trade Me for something similar for our lounge room. We have been using a little outside table for the last year and I wanted something that had different shelves so the nappies weren't on bags on the floor!
I bought table cloth material from Spotlight, half a metre for $6 with plenty left over and second hand paint made this a cheap makeover that was well worth it! The painting is a bit rough but between this and the table and chair set that I painted during the summer I can see I have improved! Next job, Millas drawers! hehe.
I love having things around the home that I have done. I do I do!
For laughs:
Originally I glued the table cloth material to the shelves but I used special plastic glue that MrMoo had (he works in plastics), and it was so strong it melted the fabric! Eeek! I had lots left over so re did it and now the cloth is just sitting on the shelves since it has a non slip backing it works perfectly!
READ MORE:
Joining in with Show n Tell
Kids Table DIY
Other things I've made
Thursday, March 28, 2013
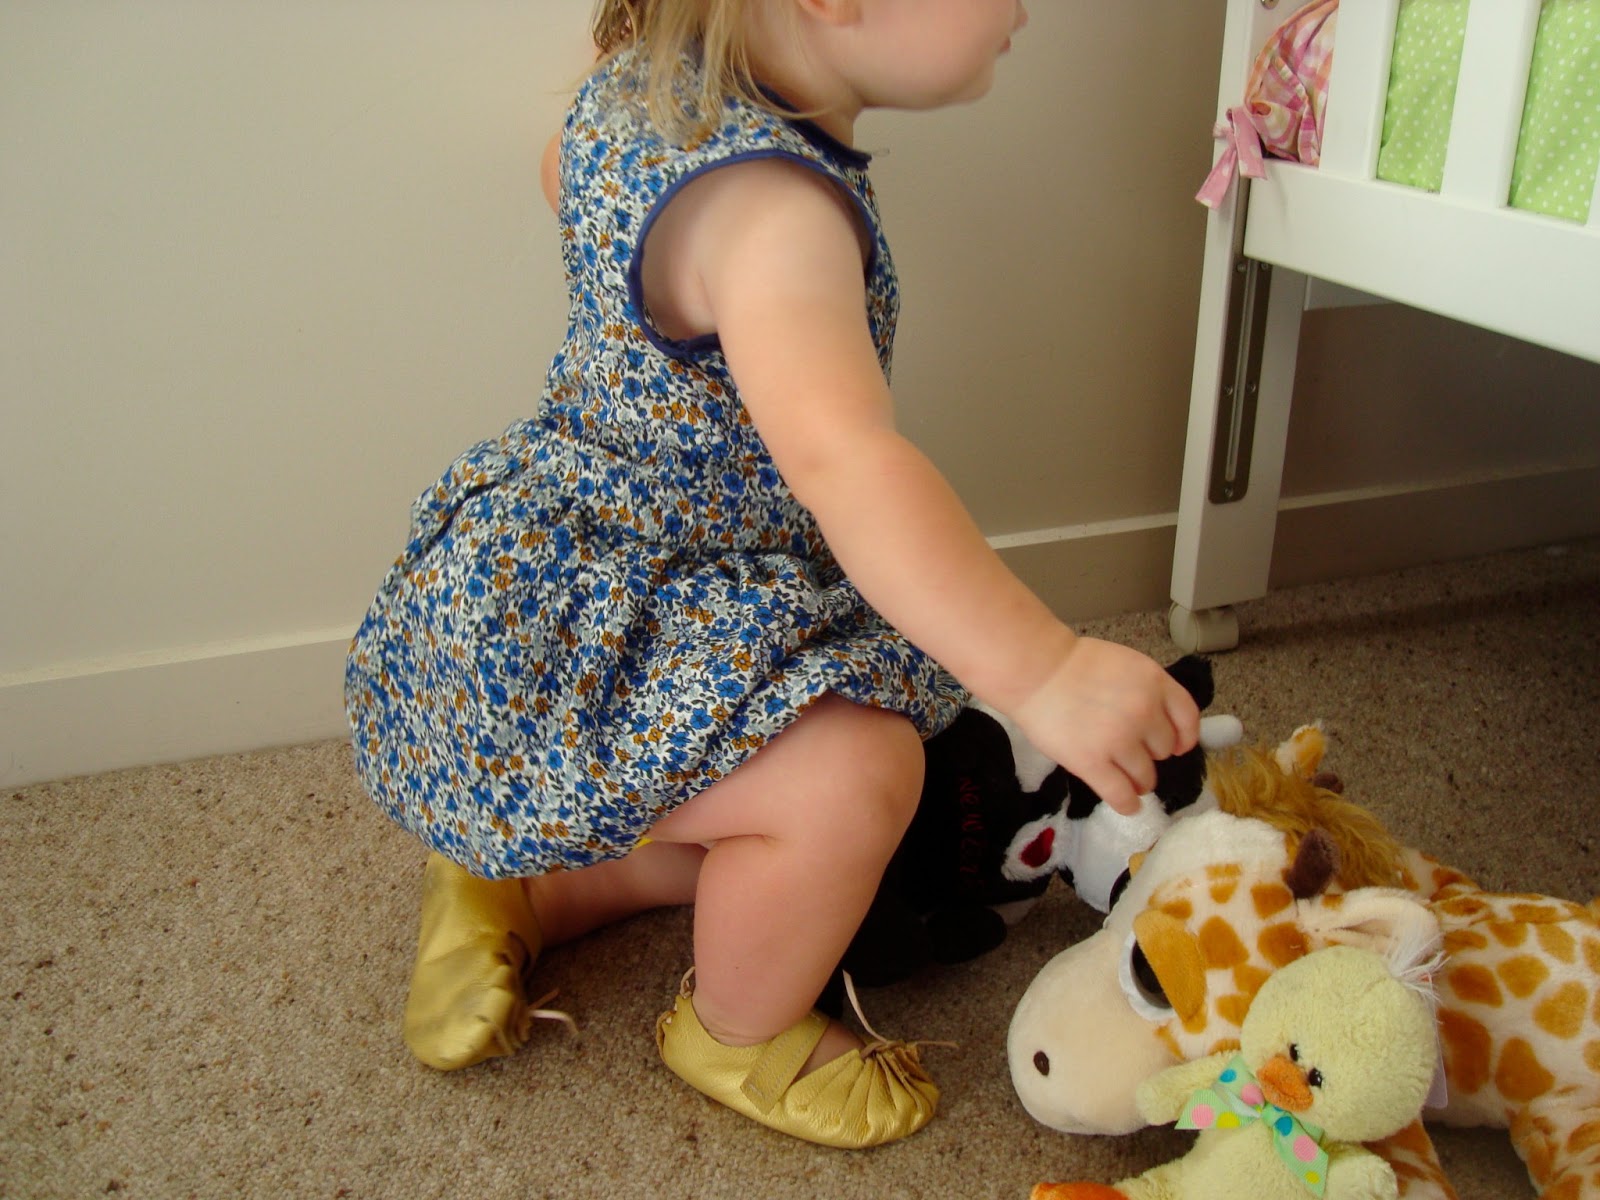
Milla Makes - Peplum Bubble Dress

The Straight-Grain blog has opened me up to a whole new world of kids fashion and what a beginner sewer can achieve.
This is the first time a fashion trend has ever "clicked" with me and I have thought "I love everything about that fashion!" Kids clothing Belgian styles: The prints and fabrics! The colour combinations! The shoes!
I don't know if I love the style for myself, but for my daughter yes yes yes!
This was my attempt at creating something different for her, I used a free pattern for a peplum bubble dress. The pattern was really easy to understand, even though I'm not a zip novice (I dont even have a zipper foot! (I can't seem to find one for my ancient Globe machine???)), and have never used bias binding before. The 18mo fit is perfect for Milla.
I'm quite proud of how it turned out, and Jen from Mend and Make New really is convincing me that sewing kids clothes is so rewarding and fun!

READ MORE:
More Creative posts on Sophie SlimJoining in with Show n Tell
Win a pair of these shoes! (giveaway closes tomorrow - Friday 29th)
Thursday, March 14, 2013
Granny Circle Blanket - Complete!


In June 2012 I started creating granny circles for a blanket, destined for my baby's future big girl bed.
I planned to make 15 rows of 12 squares, big enough for a single bed, totaling 180 squares.


I started off using scrap wool but quickly discovered that I would need consistant colours and textures to keep the weight of the blanket even. Although it looks the same, some wool will be lighter than others and it can throw the whole thing out. Some circles were ending up smaller and thinner than others etc.
Instead I used an acrylic yarn, approximately 150gms of each colour Navy blue, aqua blue, sky blue, dark purple, lilac purple, red, hot pink, baby pink, teal, yellow, lime green, along with approximately 10 balls of 100gm white.

I layed them all out randomly, no two circles exactly the same, and hung them on some yarn and stored them in my wardrobe on a hanger. I slowly got through the yarn snake, and did it in my "layed out order" so there was a nice even mix of colours (brights vs. darks etc)


Eventually it was time to start the white of the blanket and initially it was such an exciting process - to see that mass of bright colours balanced out with a simple white, imagining my daughter snuggled underneath it, I prayed for my family white I crocheted it.
Once I got to the middle it began to get tedioius; another row done and you could hardly tell. The end felt far away.
Little did I know I was actually only 1 row away from finishing, when it was bundled up and put away at the beginning of my pregnancy with Baby Moo2.
Summer was beginning, morning sickness thrived and I felt like crochet was the last thing on my mind.


In February 2013 I picked it up again, realising we wanted to move our daughter into her own bed some time in the next few months before the newest baby was born and I needed the blanket for it. Because I'm sentimental like that. And I dont miss a deadline.
I quickly finished off the last row and a half, giggling with glee that that is all that was needed to complete it and spent a week working on the border.


A recent post by Attic24 for her patchwork blanket inspired me to do a thick border around the blanket, something I hadn't given much thought to but after seeing her photos of her blankets with great big borders and understanding how they 'complete' the blanket I was inspired. My blankets will always have borders now!
I interpreted her photos of a recent border she had made up and trialled it out on my own, I love how the little spots of pink break through the white.


And here she is, in all of her nine month, colourful glory!!
Millas white Granny-Circle blanket!
She was supposed to be for a single bed, but as we haven't set Millas bed up yet I took these photos on our double. As you can see, its rather large!


THE DETAILS:
Time Taken: 9 Months
Yarn Used: 8ply, acrylic yarn.
12 balls of 100gm colours, 10 balls of 100gm white (with plenty left over)
Granny Circle pattern used: Grandma All-Square tutorial
Border Inspiration: Attic24 Granny Patch Blanket
How to stop your borders from ruffling: How to Make a Flat Border for a Granny Square Blanket
More Crochet Inspiration: Sophie Slim Crochet Pinterest Board
Thanks for stopping by and sharing these journeys with me! Blogging is so good like that!
Subscribe to:
Posts (Atom)