Showing posts with label Tips. Show all posts

Wednesday, September 4, 2013

Breastfeeding Bedside Essentials


This is my bedside, completely equipped for night time feeds, changes and life with a newborn. In those first few days I also had a stash of snacks on hand! 

Here are the essentials that I think you'll need within reach when you have a new Bebe!::


The Essentials for your bedside:

Reusable Breast Pads:: In the first leaky stage I used disposable pads, I had extreme flow, but now that things have settled down I'm using Breastmates Reusable Pads , they are soft and fluffy and just as absorbant as they say! You can fly through pads so make sure you stock up on them pre birth, or have reusables that can be easily washed on hand!

Nursing Cream:: I only needed this in the first few days when Katie was figuring out the latch thing. I used Lansinoh and a Palmers Shea Butter cream. They can be pretty pricey, but if you need them you wont regret forking out the cash. Try asking your midwife, mine actually gave me some for free.

Water:: You'll drink A LOT. That thirst is undeniable, you can't restrain it! I had a few treat bottles of flavoured water stored away. They broke the monotomy of all that boring water. You'll go through bottles and bottles so each night I always made sure I had two full bottles at my bedside for night time feedings.

Log Book:: I tracked weeks 1-4 of Katies life with a Breastmates Log Book to try and see if I could find patterns, or answer those annoying questions midwives ask like "How many wet nappies today?" "Er... let me just check my log book!" It made it especially helpful when trying to figure out if I should see an Osteo for Katie's Latch. I thought I didn't need to, but when I looked at the log book I could see in black and white her lack of feeding from my left. Brain Fuzz is real people! Log books have spaces for you to record feeds, nappy contents, moods and sleeps!

Extras you might want on hand:

Snacks: Have some snacks on hand for the first few weeks, you'll be ravenous, especially at 4am! Muesli bars were my snack of choice.

Flannels: I use flannels to catch the big milk flows in the middle of the night if I'm feeding (these days I'm only feeding once or not at all at night, so my let down is quite big right now), they're super absorbant and I just chuck them in the washing pile in the morning.

Spare nappies, wipes and bin: Make life easier and have these on hand. We also have all of Katies clothes in our room in a plastic tub on the floor. Less footwork at night the better.

Reading material: I asked my readers for book suggestions for night time reads, and got a few of them in preparation. I ended up reading my bible on my phone at night with the Olive Tree app. Now that I'm not up at all hours of the night I really miss the extra opportunities for bible reading. It was much more productive than surfing facebook or twitter for hours!

Do you have any tips of "essentials for you" that might be helpful to my readers?! Leave a comment and let us know!

Wednesday, August 7, 2013

Feeding Katie & Wearing Breastmates


Happy Breastfeeding Month!

There I was on my high horse, telling everyone how easy breastfeeding was. I did all I could to prepare to have a successful feeding relationship before my second baby was born. 

My last daughter, Milla, was SO easy to feed. She latched straight away and we never had any issues. I thought that would happen again.

But there we were, moments after birth, sitting in my nest of pillows waiting for Katie to latch. And she didn't. Not to my left side anyway. I didn't think too much of it and swapped her over to the other side where she spent the following hours.

The next few weeks were a struggle with the left. I didn't understand why she wouldn't latch to that particular side. I prayed and I hoped "please, just let me feed my baby". I was scared of going out of the house knowing I couldn't feed my baby without a fight admist tears from both of us. 

I ended up admitting that I was struggling a little on Twitter and booked in an osteopath appointment. As soon as I publicly admitted that I was having a little difficulty I felt a huge weight lifted off our shoulders. So many people replied saying they had initial trouble too, but babies and Mamas can both learn, they can get better. I felt so much hope instead of shame.

After that Osteo appointment Katie has been feeding perfectly. I am so so grateful. 

I am still glad I did all that preparing. The flavoured water was invaluable, the PJs perfect and I wear my breastfeeding cami's everyday. 

But then I hit that 3 week slump. The one when you're ready to leave the house, but you have absolutely nothing to wear. Everything is stretched from your big belly, old, or in my case, tracksuit material or flannelette. 


Breastmates were so kind to send me their brand new Nuture feeding top. Its another one of Franny's self designed in her Bump N Boob range and this one's for the cooler months with its long sleeves and layers. (And I helped name it! Aye Franny?)

It covers all my wobbly bits and hides my canyon of cleavage. The fabric is so lovely and soft and stretchy and drapey. Its slim where it should be (I love having my sleeves fit well!) and gathers where it should (around my chest and tummy!). 

The model on the website looks absolutely beautiful and perky, but I think my F Cup looks pretty good in it too ;)

It feels flattering for my body that struggles to find its happy place post birth, when everything's stretching and tightening and changing, this top is a perfect fit that seems to go with whatever my body is doing.

The front of it opens up at each side to feed, my midwife witnessed it in action and said it was brilliant! Er. I KNOW. Completely modest and stylish for public feeding, which I have done multiple times (Hoorah for well designed tops and feeding babies!) Just don't leak in it, the soft fabric soaks it up!

If you've seen me in the last month outside of my home, its probable that I've been wearing this top. Its my go to for public appearances! 


I am so grateful for babies who feed, friends and family who encourage and for lovely maternity wear that flatters and makes you feel good about going out!

If there's a next time, I'll be buying a few tops specifically for feeding before I have the baby, maybe it'll help avoid the 3 week slump?


Do you have any practical or mental ideas for a successful feeding relationship? Leave a comment and let me and other expecting Mamas know!

And hey! I'm on the cover of Breastmates Mag! (along with hundreds of other beautiful Mama and Daddys!) If you want to become a pin-up-girl check out the Breastmates Facebook page

READ MORE:
Nuture Top
Bump n Boob range
Preparing for Feeding & Clip on Cami Review
Glory Maternity Dress Review

Monday, April 8, 2013

How to Link Your Comments to Your Email Address


How to be a No-Reply Commenter No More!

Each to their own, but it drives me bonkers when I get a really great, well thought-out blog comment from someone I have never heard from before and I have JUST the reply to send them! Unfortunately when I hit "reply" in my email it comes up with that tearful "no-reply comment" in the To: section of the email.

Breaks my heart. Every time.

If you've never got an email reply to a comment you've left on someones blog its possibly because you're a no-reply commenter. If you dont want to be (as in, you want to be able to receive email replies) then this tutorial is for you!

I love continuing blog comments through emails back and forward. Some of my readers are really brilliant and I love hearing from them and do my very best to reply to them. Please make that easy for me! Become a reply commenter!

Psst - if you're a blogger did you know you can reply to comments sent to your email address for publishing approval? Just hit reply and the persons email address will (should) magically appear! Its a great way to build relationships with your readers!

If you're on blogger here's how you do it: (this wont work for google+ profiles, check out Louana for a tutorial on google+ commenting)


On your blogger.com dashboard, up the top right had corner you will see your "profile". Click on it and it will take you to your public blog profile. 

This is where people come when they want to see a photo of you, see where you live or what you have to say about yourself. 

I very rarely venture to people profiles these days, most bloggers have clued up and given themselves an About Me page that gives a lot more information!


In the top right hand corner of your Blogger profile you'll find "Edit Profile". Click it!


Editing your profile will bring up some of the details you've chosen to share with Blogger and Google.

Make sure "Show my email address" is checked!

Below that under "Identity" and "Email address" this is the address your blog comments will be emailed to.

My main email address is sophie[at]moo2.co.nz - however I get my blog comments sent to sophieslim[at]moo2.co.nz because when I reply to them it will automatically come from "Sophie Slim" and contain my blog signature! If you want to do the same, put your alias email address here.


Hit SAVE down the bottom and go back to your profile page - under "Contact Me" should now contain a link to your email address!

(yes, it does mean your email address is made public if people click it)


HOORAH! I hope you'll consider allowing your email address to be linked to your blog comments in the future!


Please let me know in the comments if you use this tutorial and became a reply-ee! I love to hear your feedback on my blog tutorials, if you would like to learn anything else let me know!


FOR MORE:

If you're on Google+  you'll want to look at Louanas tutorial on how to link your comments to your email! 

Tuesday, February 12, 2013

How to Get Your Blog Ranking High On Google


So you've done a Google search and discovered your blog post, business or name is way down on the list, or perhaps not even there? Ever wondered how you get your name, business, product, image etc to the top of that list?

It's using a handy little bit of knowledge called Search - Engine - Optimisation, or SEO for short, and I'm going to let you in on a few of its secrets today, because I care about you and your blog.

And here's the truth, its all to do with your hyperlinks.

Every time you click a link on the internet, you're sending a really quick message to the staff at google to tell them what a website is about so they can include it in their search engine.

Examples:
  • BAD: I love to tell you about blogging, go check out my blog design tips here
The above link, when clicked, will tell google that the web address it is linked to is about "here". Not really helpful at all. 

When clicked, the above link will take you to my page about designing blog headers, and will TELL Google that the website is actually about designing blog headers. Amazing!

So when someone types into google "how to design a blog header" you will notice that my page is the very first that comes up. That is no accident. 

The more that link is clicked with the correct description, the more google knows thats what the link is about, the higher it will appear on google searches. 

Get into the habit of slightly rewording your posts so you can use hyperlinks correctly, and dont forget to give your blog posts relevant titles! 

Also, pay others the courtesy of linking them correctly when talking about other sites on your own blog. When your readers click those links you'll be doing them a favour! 


Images:

The same theory applies to google image searches::

NAME YOUR PHOTOS! 

Simple as that. Each time a photo is clicked google gets told what the photo is about because of its file name. 

This is time consuming and not something I often do on my blog, however there are a few blog posts where I have pureposefully named my photos, one of those is my blog on going to the Taylor Swift concert with a 6 month old baby. 

I receive blog hits every single day because of people searching about taking a baby to a concert (i'm the top result), and for people doing image searches for "taylor swift crowd photo" (i'm the 6th result). 

--------------------------------------

Read More:
If you want to know more about blogging, check out some of my most searched topics:
Must Know Side Bar Tips
How To Find Out The Size of Your Blog Header
How To Link Your Email Address To Your Comments (so bloggers can easily reply directly to you!)
How To Create New Tabs On Your Blog
How To Create A Blog Header In Under 5 Minutes

--------------------------------------

Did you know about SEO before you read this post? Anything else you would like to learn? Leave a comment and let me know!


Wednesday, July 4, 2012

Mama Support

Plunket Pepe group - Circa January 2012

Pre baby I had all of these misconceptions about what it would look like to be a mother, one thing I got wrong was how much I would need mother to mother support. Initially I thought it was a bit weird that we would exchange phone numbers at antenatal - what do I have in common with these people? I thought.

Then along came baby.

During an interview I had last week I was asked why I thought it was important that The Sisterhood was for ladies. I thought about it, and came to the conclusion that in the last year I have realised and now understand how absolutely vital it is to have peer support. A year ago I didn't understand that. Now I do. Now I need it. 

Together our Plunket group went through the Pepe course. I explained what happened there (parenting skills, taking care of a new born, chit chat, life) to my own Mother, she thought it was brilliant, they certainly didn't have anything like that in her day.

To cut a long story short most of us have managed to stay in touch. We have a fortnightly play date together for the ones who haven't gone back to work, and last week we went out for dessert and a glass of wine. While it was dark. Alone. I was 'dressed up'. No one was sitting in my lap. It was fab.u.lous.

So last week while we sipped wine we shared a few more birth stories, laughed a little and just enjoyed each others company I thanked them for being in my life.

Each of these ladies is unique with different backgrounds, birth stories, parenting styles, hopes and dreams. But each of them is a friend that I have shared this big part of my life with. 


If you are heading into a pregnancy please hear these words: Don't underestimate this support.

Seek to make new (with baby) friends, people who will know what you mean when you say you didn't get any sleep last night (its not that you tossed and turned for half an hour. Its that you didn't. get. any.). Make an effort to meet with your antenatal group, your Plunket group, your local playgroup. Go dancing with your baby: If only for that hot cuppa and a chat to another parent afterwards.

Who did you have around you when you had a little baby? What made them so amazing? Leave a comment and let me know!


READ MORE:

Tuesday, July 3, 2012

How To Create Tabs in Blogger


Pages are really beneficial for blogs, in them you can have 'about me' details, contact details and any extra things you want to convey but they don't really have a 'home' on your side bar (or would make it really cluttered!). It's really easy to do!

Heres How You Create Pages / Tabs:


On your Blogger dashboard find your 'pages' option


In your Pages choose "New Page" from here you have two options: 


Blank Page:

This is where you have a blank field, exactly like a new blog post, that you can customise with links, photos and text. This is great for your "About Me" page.


Web Address Page:
This will open a new window where you can enter the name of your page and send the reader to a new web address. For example, if you had an online shop you could call you page 'Shop' and have it link to your felt store.

The down side with this (having a web address page) is that obviously your readers are going to a different web address that isn't your blog. We call these "Exit Links" and you want to minimalise them so your readers stay in your blog land as long as possible.


Once you create your new page and save it it will be added to the bottom of your list.

Re-Order Your Pages:
You can re-oder your tabs by clicking on the blue filled in side of the box and dragging it into the right order. You'll see when you do this they all jump around to adjust.

Extras For Experts:
Every now and again you might find the need for a web address but you might not want to publish it on your blog. It might be to share information with a group of people, photos, codes, anything really.

Create a page for this information like above, save it, then drag and drop the box into the "hidden posts"  section. (You'll see published, drafts and hidden options available). That way, when you view it the web address still exists but it doesn't show up in your tabs (but it will show up in google searches - beaware that it isn't private!)


Hit "save arrangement" in the top right hand corner and you have a new set of tabs! HOORAH!

Brilliant huh?


Read More:
Do you have tabs on your page? Are you going to make some now? Leave a comment and let me know!


Tuesday, June 19, 2012

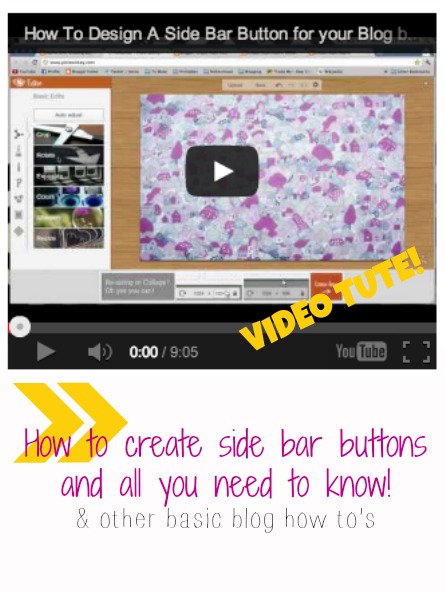
How To Create Side Bar Blog Buttons (VIDEO)


If you have an about me page, any regular features on your blog, something your readers ought to know about you, or a blog in general, then you definitely need customised side bar buttons.

It is really easy to create your own side bar buttons and this video will show you how. If you viewed my video to make your own blog header you will realise that it uses almost the same process of creating and uploading your pictures to do so.

The standard size of a blog button is 160 X 160pixels - this is a great size especially if you are creating your button that is intended to be share with others because you know it will fit in their side bar (like my sisterhood button)

Otherwise, you can create your own custom sized buttons (like my "about me" and Create ones on the right of my blog). To find out the size of your blog side bar use the same method I show you to figure out your header size but for your sidebar instead!


After watching this video: Honestly, the bum bum thing about using this method to upload your button to blogger is that if it doesn't fill your whole side bar up (eg, if you used the default 160x160pixels size) it will stick to the left side of your side bar.

I like things to be in the middle. 

To fix that you're actually going to need to do it with HTML and I thought that was getting a little bit complicated for this video. Instead, I will do an 'extras for experts' video in the near future and explain how you do that, also how you share your button with the big wide world using code! Hoorah! Easy peasy! (video still to come...)


READ MORE:
How to create pages and tabs
How to link your comments to your email address so bloggers can reply
How to get your blog turn up in Google searches

Have any questions for me? Leave them in the comments or email me directly on sophie AT moo2.co.nz

Tuesday, June 5, 2012

How To Create Easy Blog Headers


Last week I taught you how to find the dimensions for your blog header, and before that gave you some useful side bar tips for your blog.

This week I am showing you (in a video!!) how to turn those dimensions into a real life header.

All you need is a web browser, those dimensions and a photo while you're watching this video I made:


Here I use picmonkey to create a custom header for Miriam at Create, Hope, Inspire.


READ MORE:
How to find the size of your blog header
Introduction and side bar tips
How to create side bar buttons
How to create pages and tabs
How to get your blog found by Google
How to link your email address to your blog comments


Have any questions for me? Leave them in the comments or email me direct on sophie AT moo2.co.nz 

Tuesday, May 29, 2012

How To Find Out The Size Of Your Blog Header


The header on your personal website is one of the first things your viewers will see, so it needs to represent you well and give the viewer an instant download as to what they can expect, along with being visually appealing.

All around the blog world I see headers that are off to the left, or are super duper huge like they have just uploaded a whole photo. Its good to see a little bit of blog text below your header - this is your "landing space" where peoples eyes are drawn to. If you just have a huge photo as your header a reader might only spend 1 second on your page and they wont learn anything about you!

This is so frustrating for me because I know it is such a simple fix.

If you're thinking "that's exactly whats happening on my blog right now" then this is for you, so keep reading, I might just be able to help you!

Your header is off center and massive because it's the wrong size for the space where your header should be. 

You need to make a header that is a specific size for your website (this will depend on your blog template or what you've chosen your blog dimensions to be (which probably happened when you first made your blog. They can easily be changed!)

Here's how you find out the size your header needs to be

  • To find out the size of the space open up google chrome (its free to download, and in my opinion the best browser you can use right now) (You can also open Firefox and it will do almost the same thing)
  • Right click on your blogs tab line - This will open up a little drop down menu, click "inspect element"("Get info" in Firefox)

  • This Inspect Element button will open up a new area in the lower half of your chrome browser. Here, it will bring up all of the HTML that you are viewing on your page, and highlighted, it will show you the area that you just clicked on. It might look a little scary.
  • If you happen to move your mouse and loose the info, on the top half of your browser hover your mouse over the area you want to view (your tabs (because this is the width of your page))
  • Alternatively, you can use the up and down button on your keypad to scroll through the lines of code. With each line you scroll down, on the top half of your page a new section will be highlighted. Keep scrolling until your tabs are highlighted, like below.

  • Can you see 1040x30 px? These are the pixels. The WIDTH (from left to right) of my header needs to be 1040 pixels.
  • If you're planning on redesigning your header the height of it is up to you. My current header is 300 pixels. 400 pixels is nice too. You choose! Just enter the number in whatever you're using to create a header and play around with what works best with your design. I've done a handy blog post and video on how to design a blog header in 5 minutes using a free online editing program. 
  • So, my headers dimensions are 1040x300pixels

Write your dimensions down and stick them to the fridge, you'll need to remember your pixels when you go and create your new blog header!

If you would like to play along but you are already confused, please email me, sophieslim@moo2.co.nz , I'd love to help :)

Read more on blog tips:
Must Know Side Bar Tips
How To Link Your Email Address To Your Comments (so bloggers can easily reply directly to you!)
How To Create New Tabs On Your Blog
How To Create A Blog Header In Under 5 Minutes
How To Get Your Blog In Google Search Results


Was this helpful? Have you used any of my tutorials? Leave a comment and let me know how it went!


Tuesday, May 22, 2012

Must Know Tips About Your Blogs Sidebar


I blog for fun, to learn, be a part of a community, to document our lives, to resource others and to inspire a little bit along the way. That all said, I am really interested in making my blog a better, nicer place. I like aesthetics and I can appreciate that as people, we are very visual and only have a few seconds to make a first impression.

In person, that impression can be made in many different ways; In the warmth of your smile, the tone of your voice, your appearance and hygiene, your body language. When it comes to your website you only have a few seconds and those seconds are usually taken up with the visual appearance of your blog.

Now, I'm not graphic design whizz, and my own website isn't perfect. Everything I know has been self or husband taught, but I have spent many years creating blog headers, keeping a website and designing church advertisements. I've picked up a few things along the way and I wanted to share them with you.

I've made a whole basic blog design series that I am constantly updating and adding to. There are links at the end of this post, or subscribe to my blog to get the latest.

Tips For Your Side Bar

  • Do include a clear about me and a "landing space" for new readers.

    What's a landing space? Its a place your new readers can rest their eyes and know about you in a glance. Its a place they will go to "next" to find out more about you. Give them that space to land. Include a few sentences to sum up you and your blog and direct them to where they should go next - Popular posts? Things they must know about you? Meet the family?

    What is the most important thing for your new readers to find when they come to your page? This should be included near the top of your side bar.
  • You want your new reader to see the best of you, so keep it fresh and new and relevant!

    Chuck out those old blog awards from 2007, you want readers to know the now you, not the old you. Do you have a new post to add to your popular posts repertoire?

    Every few months I add something new or update my side bar, this keeps it slightly different and gives a very loyal reader something new to notice and look at. It also means if my information is changing and easily accessible people will spend more time on my page.
  • Don't go overboard and change your whole design every week. You want your whole image to represent you and be recognisable to a returning reader so they remember you.
  • Have your most important things at the top - for me thats a little bit of information about myself and my sponsors. For you that might include your post history, or your shop details. Order your buttons in priority.
  • Keep all of your icons in your side bar aligned. You definitely don't want some things to the left, others to the right and a couple in the center. Have them all in the same space (center is good).

    To align them in the center, go into the HTML widget in your blogger template and add < c e n t e r > (without spaces) at the beginning of the code and < / c e n t e r > (without spaces) right at the end. Save and repeat for all of your HTML widgets. 


READ MORE:
How To Get Your Blog in Google Searches
How To Find Out The Size of Your Blog Header
How To Link Your Email Address To Your Comments (so bloggers can easily reply directly to you!)
How To Create New Tabs On Your Blog
How To Create A Blog Header In Under 5 Minutes

Do you have a side bar philosophy? Personally I think they are one of the most important elements to determine the future success of a blog! (Eek! Pressure huh!)


Monday, April 30, 2012

Cloth and Disposable Round Up

A lot of great feedback was left on my two posts last week from my readers about the use of disposable and cloth nappies.


If you've had a baby its something you would have spent a fair bit of time thinking about, in those early days, easily changing 10 nappies a day, maybe thinking to yourself "is there something better out there?" Whatever way you chose to go, after my posts last week I thought I would summarise and also publish your suggestions and tips on the blog!

CLOTH

Since posting last week I have increased my use of modern cloth nappies. I am finding they are a lot more absorbant than I first thought. Its really amazing what they can hold but I still haven't used them over night.

Storage - Make them accessible - Have your cloth nappies at your changing station. I have a little basket in our lounge with everything I need to change the Baby. In it is disposables, reusables, baby flannels, wet wipes & baby powder. It hides behind the couch so its out of sight. Seeing the reusables when you go to get your supplies will remind you to use them.

Have a plan to wash them - At this rate I do one load of washing a day, I alternate between whites and darks everyday. So far I have been washing my nappies in the white load. I toss the nappies in a rubbish bin with a closeable lid in the laundry until a white load day. So far I have not needed to do any extra washing. If I was using the cloth nappies around the clock it may add an extra wash during the week but that would be the extent of it.

Washing - Keep powders to a minimum, you don't want to get power stuck inside and clog up the microfibre fabric. If you do, you can strip them. I think you do this with hot water but I'm not entirely sure :) Don't soak them.

Poop - Any poo in the nappies I 'knock' into the toilet and flush away. If things are a bit squished I rinse them under the tap then chuck them into the rubbish bin in my laundry. There are such things as nappy liners - you put them inside and then can lift them out with the poop attached. You can get them from the supermarket but I don't know what they are made out of so I haven't looked into them.

Smell - Things can get a bit stinky in that rubbish bin. Miriam suggested sticking on the inside of the lid a panty liner that has a few drops of smellies on it. I used lavender oil and it works a treat! I have also heard baking soda in the bottom of the bucket to soak up the smells but I tried that and didn't find it worked.

Stains - If you find you have any stains after washing hang them out to dry in the direct sunshine. If you didn't know this already, the sun will get most stains out of your clothing. I only learnt that last year and it has REVOLOUTIONISED our laundry. Its now my mission to tell everyone this. The sun is your laundry friend!

Folding - If you're using insert nappies like I am (and love them!) put your inserts in when you're folding your washing. It only takes a few extra seconds then and there so they are ready to go later (making them accessible, remember?)


DISPOSABLES:

If you're buying nappies before your baby is born you need to know that you buy them by the weight of your baby. Each brand has their own weight measurements so it can get a bit confusing. Before our baby I bought 6 packs of newborn nappies (around 4kgs) and 3 packs of the next size up (generally called 'infants' (6 or 7kgs ish). With a new born you're changing nappies pretty regularly. Some days I was using up to 12 nappies a day in those first few weeks. That chugged me through a pack in a matter of days. I was worried I'd have too many new born nappies left over but I didn't have a big baby so she fitted them for a while. 


Huggies seems to be a very good nappy choice for those babies with sensitive skin. I have heard of many cases of babies coming out in rashes when in other nappies and not in Huggies.


Widge also suggested Cherish, a Pams brand that supplies sizes over 6months old.


If you're worried about the environment but still need to use disposables like Max you could look into 'enviro-comp': For a fee they pick up your nappies and compost them. Otherwise disposables sit in land fills for years while their contents rotts and chemicals leak... You get the point. Composting is goooood.


If you're not composting and just chucking them in the bin (argh, a part of me feels so irresponsible talking about this, but I do it, so i'll talk about it) keep some bags handy. I use that huggies wet wipes container (the travel flat one with the lift up lid) to keep my bags in because I feel its much safer than just having them float around the lounge or my baby bag. Some times I buy bags. You can buy nappy bags from the supermarket or a $2 shop, or often I use our left over plastic fruit and vege bags from the weekly groceries or bread bags. They are pretty perfect sizes.


When I had a new born I had a clear plastic zip up bag that stayed under our change table and I put the dirty nappies straight in there after changing the baby. I also put a few drops of lavender oil in there because when you get a few dirty nappies in the bag it can start to stink. Once a day I would empty the bag and it would mean you weren't always going to the rubbish bin after every change, especially during the night! 


I hope some of that information helped, it certainly helped me and I loved receiving all of your feedback! Do you have anything else you'd like to share? Leave a comment and I'll edit the post to keep it up to date :)


READ MORE:


Tuesday, April 24, 2012

On My Favourite Nappy - A Review

In all my life I never imagined I would be so consumed and focussed on the contents of a nappy.

Nappies are so important and I completely underestimated their value prior to Baby. I found myself carrying around multiple changes of clothes because of the inevitable poo explosion. It is a total pain in the *bum*, holding a baby and realising you have poo on your arm, on your clothes, on their legs. Gag. I am SO glad we are past that stage and have moved onto something more solid and more cloth nappies!

I tried a lot of brands; Huggies, Treasures, Baby love (aweful), eco genius nappies, Budget Brand (sucks!!). My favourite nappy? Homebrand.


What!!?? You don't have to pay the earth for a good nappy? I know! The cheapest nappy of all provided the best coverage, absorbency, fit, price, range of sizes and well, I couldn't really fault them.

I know. Disposable nappies! Cue the nappy banshees raining down on me! I know disposable nappies are filled with only God knows what chemicals. I'm not condoning their use, but if you're going the disposable way; I can recommend Homebrand nappies - Ain't no shame in havin' Homebrand in your nappy bag!

What did I think about the other nappies I tried?

HUGGIES REVIEW: Huggies were always the most expensive. They did their job, but I'm a Mum looking for a bargain and it wasn't anywhere near huggies. They have cute designs on them, but honestly, my Baby doesn't know who Winnie the Poo is, and I'm not fooled by your expensive marketing campaign! The outside of the nappy felt almost like brushed fabric

TREASURES REVIEW: I quite liked treasures. They were unisex and purple, not sure if that effects the use by a Mum of a boy, but I enjoyed them none the less. When my baby got a bit older and was rolling over during her sleep she would wake up in the middle of the night and be soaked in her own pee - I think it was because her tummy was squishing the nappy and pee was coming out the top. Don't ask me how that works by it only ever happened with Treasures nappies! The outside of the nappy feels a lot more papery than Huggies - very different!

BABY LOVE REVIEW: Aweful. Don't even bother. I bought them because they were on sale and I immediately regretted it. They leaked nappy contents 70% of the time and I didn't even use up the whole packet, I gave up. They do have good sales on their nappies though so sometimes you can grab a bargain, but i'll never be fooled again! The outside of the nappy has some sort of synthetic layer on it, supposedly to stop leaking, but I found my baby was very damp and sweaty underneath even when the nappy was relatively dry. I think it prevented her bum from breathing. Unlike all the others they don't have a stretchy waistband at the back. I don't know why, but the stretchy waistband is definitely good. Oh, and they have the wiggles on them. Marketing to my 3 month old? No thanks! I would never bother with these again.

ECO GENIUS REVIEW: I am having nappy-brain. I can't remember using these but I know I wasn't fussed.

BUDGET BRAND REVIEW: Leak, leak, leaks!

**All of my opinions, no sponsorship involved.

Oh! Can I say something else about Homebrand? Yes? Thankyou. Last month I bought my Babys regular size and when I got home the nappies inside the bag were huge! I emailed them, and went in and they exchanged my nappies and gave me a full refund! A 200% guarantee! Huzzah Countdown!

READ MORE:

Friday, March 23, 2012

Flying With A 6 Month Old


We flew from Christchurch to Auckland last week, our first flight with Camilla. Camilla was 6 months old at the time and did very well.

We were flying with Jetstar so I had low expectations, I thought they would be delayed, or tell us we couldn't check in our baggage, or something, anything. But the check in process and flight was straight forward. I had had a friend tell me what she wasn't allowed to take her pram on her flight, however their website says that you can take all baby accessories for free in addition to your usual check in baggage. We had a portacot, pram, capsule and an extra carry on bag for baby. All were checked on with no problems at all. 

It is said that it is good to feed your baby as you take off and land because it helps with the altitude change and their ears because when they eat it encourages your ears to pop. Anyway, Camilla wasn't milk hungry, she didn't want a bar of it so we slipped in a pacifier and she was happy enough.

On the flight up she was quite grizzly. Not unbearable but definitely enough to make me feel sorry for the man sitting next to us. There was another girl (maybe about 1.5 yrs old?) across from us and she was grizzly too. Her mum had books, colouring in and activities packed for her. Organised! It just goes to show that every age brings new adjustments and challenges. 

On the flight back the flight was delayed by over half an hour (typical) so again it was hard to time her feeds. I ended up feeding her her solids during take off but the taxiing took so long she was almost done by the time we were going down the run way. We poped her pacifier in again and she fell asleep with her Dad for the whole flight and only woke up when everyone was undoing their belts at the other end. Super Babe!

I found I had a lot of anxiety while taking off and landing; It felt just like an earthquake to me. (do other CHCH people find this too?) Lots of bumping around, shaking and rattling and a loud out of this world noise that is so hard to explain. 

Flying with Camilla was relatively easy, the hardest part was trying to time everything but at the end of the day she coped very well! Also, I think its great that infants are free as are their luggage!


Thursday, March 22, 2012

On Taking A Baby To A Concert


We took Camilla to her very first concert at 6 months old. I was nervous .

I'm writing this post to let you know that yes, you can take your baby to a concert. I've written our experience down here, and toward the end of this post have summarised my tips and tricks in bullet form to make your experience a worthwhile one!

...

I had nightmares that we would be turned away at the door, I fabricated arguments of what I would say if they did so "I'm a breastfeeding mother!!" or how I would react to judgemental onlookers.

You see, we almost had to take her. She is very attached to us and I know that our baby cannot be consoled by anyone other than her mother. She wakes up everynight at 10pm and I knew if she saw the people we were staying with instead of me she would scream her head off. We would get a worried phone call, and we would be stuck in the carparking building and not make it home for another hour. Meanwhile Camilla is wondering where her parents are and minute by minute loosing trust in us. Well. Thats what I pictured anyway. And it was 99% going to be reality. We decided just to take her. It was going to be much easier and much less stressful and much better than the alternatives (not going).

We were so excited to see Taylor Swift live in New Zealand!

We missed the opening act on purpose. I had never heard of them anyway and thought that the more time we could spend doing other things and Camilla not being trapped in the sling would be better (and hopefully making her more tired).

As we approached the venue we put Camilla in our Moby Wrap on my front. We put her front facing as we thought with so much going on she would probably want to watch everything (we later turned her around so she could sleep). She also had baby earmuffs on which were leant to us by a friend. They definitely block out a LOT of sound (she didn't even flinch later to the noise of fireworks right infront of us).


We arrived at the venue just as the crowd was screaming "Taylor! Taylor!". Everything was dark, the lights were flashing, there was a sea of screaming people, and then Taylor Swift appeared on stage.


I was overwhelmed and so was Camilla. She cried and cried and then she screamed. We found our seats, the ladies next to us gave me a sympathetic yet "why on earth didn't you leave her at home" look. I took Camilla back into the foyer where she quickly stopped crying. We went into the bathroom and she was happy to look at herself in the mirror. We went back into the concert and were met with the same reaction. Graeme took her into the foyer this time and I thought that would just be the way the night was, swapping her between us while one of us enjoyed one song. That all took about 5 minutes. So really we didn't miss much of the concert.


She was swapped back to me and I turned her around in the sling so she was facing my chest. Instantly she was happy. She had a familiar face to look at and she was all smiles. Her eyes drooped so I stroked in-between her eyes and she fell asleep instantly on my chest. I stayed up the back and soaked in that moment. There's something about being in a big crowd that is so exciting. I was listening to great music that we had been looking forward to for 6 months. I had my daughter fast asleep on my chest and I was drinking in the oxytocin (above).

Graeme came up to see me and we stood together. We were happy!

A staff member came and told us we couldn't stay where we were (we were in front of the exit doors, a fire risk apparently, you're supposed to be in your allocated seat) but said she had better seats closer to the stage if we would prefer. Yes please!


We moved around the arena so we were right next to the stage. The lights were brighter, the people were less and it was a much better experience there.

We loved the Taylor Swift concert. It was a full on performance, nothing like I have ever seen live, except exactly like her DVD. I thought perhaps Auckland would put on a half effort show, perhaps because of the budget or venue, but no. It was fabulous! Exactly like watching it in Blu Ray, except we were seeing it with our very own eyes and feeling it in our hearts. Taylor is a fantastic performer. The costumes! The aerialists! The lights! The ribbon confetti! The floating stage! The acting!


Camilla woke up with about 3 songs to go, she stayed in the sling and was a happy little girl. Most of the time she focussed on the big screen or on the stage which was in easy view. She didn't even flinch during the fireworks which were meters away so I know she couldn't hear much.


After the concert as people were filing past us so many people stopped to appreciate and comment on her and us "Good on you!" so many people said.

When we got back to the car while waiting in traffic I fed camilla some more dinner out of a can and she fell asleep shortly after and slept for the rest of the night.

It was such a great time and I really think I had more fun with her there! I didn't need to check my cellphone, we were bonding as a family and its something we will always remember :) We are so glad we took her to the concert at 6 months old.

Here's a summary on taking your young child to a full on concert performance:

  • Don't be anxious! No one at the arena ever mentioned we couldn't take our baby, in fact the staff actually helped us and gave us better seats (seats to the side of the stage were much less chaotic than at the back!)
  • Have something to hold or carry them in.
  • Camilla definitely preferred to be looking away from the chaos - at 6 months old she couldn't make sense of it and it seemed to make her very anxious. She was perfectly fine when she couldn't see it
  • Baby earmuffs! These can be found at most hardware stores, they cancelled out most of the noise. I know this because she didn't even flinch at the indoor fireworks only meters from us.
  • Indoor concerts get HOT, dress your Bub appropriately. 
  • If you're holding your baby on your chest sing along to the music! The vibrating in your chest will probably put them to sleep.
  • Have food ready for afterwards. They're most likely to wake up when you have to put them back in the car, or your change of scenery affects them (going outside = cold, etc). Whether thats milk or solids, come equipped.
  • Leave a little bit early, or hang around a little bit later, try and avoid that full on people and traffic jam that happens after concerts.
  • I was worried about the public being cruel to us but they were lovely, many offered to take photos of us and asked all about her afterwards. 
Have fun with your whole family! If you take your baby to a concert leave a comment and let me know how it went! 


This photo was taken afterwards by the lovely staff member who got us better seats during the concert!

All photos are ours and are taken from different view points because we had 2 different seats throughout the night. 
Pin It button on image hover